


Next: Traversing the hierarchy
Up: Using the Editor
Previous: Arranging nodes
The object level, as you see it now, lacks explicit
structure and is essentially flat.
For complex software systems, with many more nodes and
arcs, the resulting visual clutter can be confusing.
However, there is usually some organization.
Abstraction is one way of managing complexity.
It is good software engineering practice to encapsulate a
data type and its access functions into a software
subsystem, forming an abstract data type.
The rigiedit program provides many ways to help you in
identifying subsystems of related artifacts.
These subsystems may, for example, represent high-level
software components, personnel assignments, or other
application-specific information.
To identify the data types in the system by filtering the
Module nodes:
-
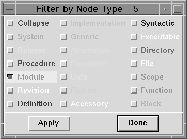
Choose Filter by Node Type ... from the
Filter menu.
A Filter by Node Type dialog appears for the active window.
Filters are used to show or hide nodes and arcs of
different types.
This dialog presents a choice of node type filters each of
which can be toggled on to hide or off to show the
associated type of node.
-
Toggle on the Module item from the dialog.
Click on the box beside Module.
-
Click Apply.
Nodes representing functions are now filtered (hidden),
making it easy to identify and select the data type nodes.
(For simple examples, this isn't necessary.)
-
Move the Data nodes aside in the canvas.
-
Toggle off the Module item from the dialog and
click Apply.
Nodes representing functions are shown again.
-
Click Done to dismiss the dialog.
To identify the access functions of the list
abstract data type:
-
Choose By Name ... from the Select menu.
A Select by Name dialog appears.
Selecting by name may be more useful for very large
graphs.
-
Type list and click Select.
The list Data node becomes selected.

-
Click Done to dismiss the dialog.
-
Click the Arc Type button in the
Workbench window.
An Arc Type palette appears.
This palette causes certain selection operations to
consider or match only specific arc types (data arcs,
here).
The any choice in the palette matches any arc
type.

-
Pick the data item from the Arc Type palette.
-
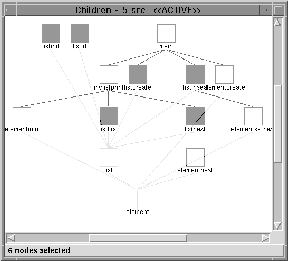
Choose Incoming Nodes from the Select menu.
All neighboring nodes along incoming arcs, that is, clients
of list, are selected, identifying all functions
that access the internal structure of the
list data type (through a data arc).
To create a new subsystem node to represent the
list abstract data type:
-
While holding down the shift key, left click the
list node.
The list Data node is added to the
previously selected group of six Module nodes.
-
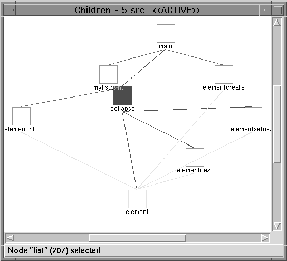
Choose Collapse from the Edit menu.
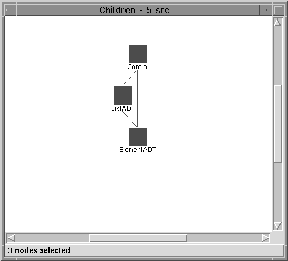
A new subsystem node is created that has all of the
previously selected nodes as its children, thus simplifying
the graph in the active window.
The previously selected nodes are moved to a lower level in
the hierarchy (and are deselected).
The new node is of type Collapse and becomes
selected.
Composite arcs are added to relate the new node to other
nodes in the window.
 Tip: To undo a collapse, choose Expand from the
Edit menu for the subsystem node.
-
Right-click on the new subsystem node.
A Node menu appears.
You can bring up a Node menu on any node, even if it is
not selected; the available choices apply to that node.
Canvas menus in rigiedit are context sensitive and depend
on what node or arc is under the pointer.
-
Choose Rename from the Node menu, type
ListADT, and press the enter key.

The new subsystem node is renamed to ListADT.
-
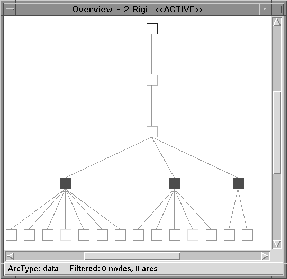
Activate the Overview window.
 Tip: [2.25in]
Right-clicking on the canvas of the window to activate it
does not disturb the current selection.
-
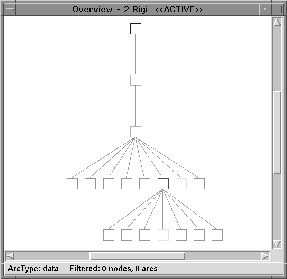
Choose Update from the Window menu.
The hierarchy in the Overview window is updated to reflect
the newly created subsystem.
On your own, return to the Children window and identify the
four Module clients of the element
Data node.
Note that the element data type has a recursive
data dependency and is a client of itself.
Collapse the five selected nodes to form another subsystem
node called ElementADT.
Collapse the remaining two nodes into another subsystem and
name it Control.
Update the Overview window and move aside the
Children window so that you can find it more easily for
operations in the rest of the tutorial.


Next: Traversing the hierarchy
Up: Using the Editor
Previous: Arranging nodes
James Uhl
Wed Jul 10 14:13:22 PDT 1996


